Mobile Pentesting Series - Anbox Setup
A quick setup guide to get Anbox running. This guide assumes a Debian-based system, like Kali Linux, if you’re using something else adjust accordingly.
Basics
First up, you need snapd and the android development bridge.
sudo apt update
sudo apt install snapd
sudo apt install android-tools-adb
Install Anbox with snap.
sudo snap install --devmode --beta anbox
Add it to path, otherwise you get the good old “The command could not be located because ‘/snap/bin’ is not included in the PATH environment variable.”
export PATH=$PATH:/snap/bin
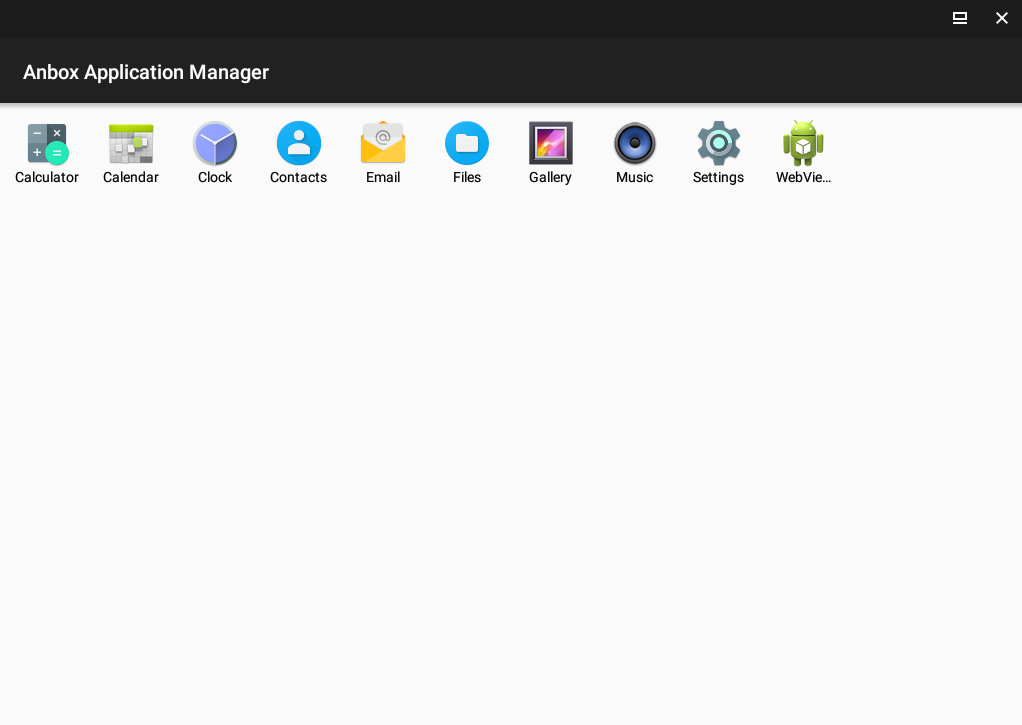
You can start Anbox with
anbox.appmgr
and then see the Anbox Application Manager.
It should also register under “adb devices” and be usable with adb in general. However, in my experience, Anbox and adb can be rather finicky. Anbox must be running for it to be usable with adb. In case it does not show up, try the following troubleshooting steps: Stop Anbox, restart adb, start Anbox again, open Anbox appmanager, check for adb devices.
sudo snap stop anbox
adb kill-server && adb start-server
sudo snap start anbox
anbox.appmgr
If you experience graphical issues, or blacked out screens you might want to try and enable software rendering.
sudo snap set anbox software-rendering.enable=true
To install an app on Anbox you must use adb
adb install example.apk
and make sure to use “x86 64bit” not “ARM”.
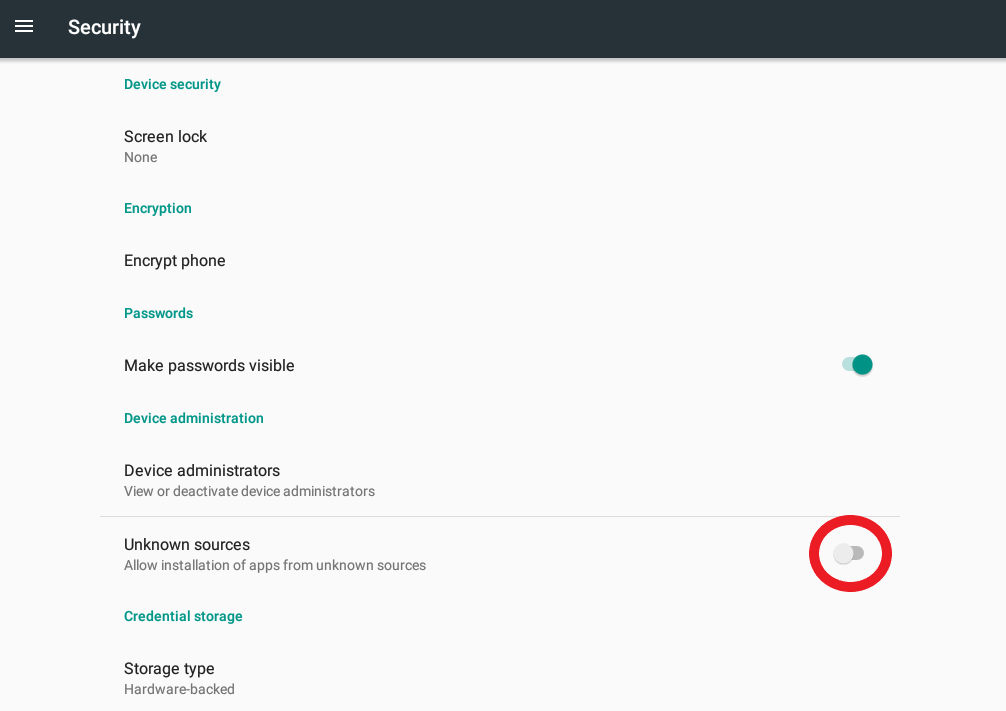
Depending on your app, you might need to allow installation from unknown sources, under “Settings” -> “Security”.
In case you have trouble with app signing, or have an unsigned app, you can use uber-apk-signer, a command line tool, made by github user patrickfav.
Proxy
Anbox operates via a default bridge, which you can check like this:
$ ifconfig anbox0
anbox0: flags=4163<UP,BROADCAST,RUNNING,MULTICAST>  mtu 1500
        inet 192.168.250.1  netmask 255.255.255.0  broadcast 0.0.0.0
        inet6 fe80::98d8:89ff:fe3f:2e25  prefixlen 64  scopeid 0x20<link>
        ether fe:9e:c7:5d:19:45  txqueuelen 1000  (Ethernet)
        RX packets 30  bytes 2376 (2.3 KiB)
        RX errors 0  dropped 0  overruns 0  frame 0
        TX packets 33  bytes 7357 (7.1 KiB)
        TX errors 0  dropped 0 overruns 0  carrier 0  collisions 0
Set a global proxy via adb with Anbox IP and a port.
adb shell settings put global http_proxy 192.168.250.1:8855
Set your proxy, like ZAP or Burp, to listen at the address, in this case 192.168.250.1:8855.
You can deactivate the adb shell proxy with
adb shell settings put global http_proxy :0
You can also change Anbox default address with
sudo snap set anbox bridge.address=192.168.250.69
Nice.
Advanced
There is no need to restart adb for a root shell, you can just “su” from a regular adb shell.
$ adb shell
x86_64:/ $ su
x86_64:/ # whoami
root
However, you cannot write to protected directories, like “/system”, which you need if you want to add your custom certificates for HTTPS traffic. For this you must use Anbox “rootfs-overlay”.
This is done by enabling the rootfs-overlay and restarting anbox.
sudo snap set anbox rootfs-overlay.enable=true
sudo snap restart anbox
You can then write via the rootfs-overlay, which is by default located in /var/snap/anbox/common/rootfs-overlay. To add your own certificate, you would then place the structure “/system/etc/security/cacerts” in the rootfs-overlay and add your cert in the /cacerts folder. Lastly you must change the file permission of the certificate (example cert.0) in the folder via:
sudo chown 100000:100000 /var/snap/anbox/common/rootfs/cert.0
More on Anbox rootfs-overlay can be found here.